It’s 2025! Can you believe another year has flown by, along with three weeks of January? By now, many of us who set New Year’s resolutions, myself included, have already started slipping on those goals. This year, I was seriously tempted to declare my resolution to be…having no resolutions at all. Speaking of which, have you ever wondered about the unique history of this tradition?
The history of New Year’s resolutions dates back about 4,000 years to ancient Babylon. Babylonians made promises to their gods during a festival that symbolized a clean slate and the start of new agricultural and spring tasks. Although the nature of resolutions has evolved, the core sentiment of striving to make the new year and ourselves better remains the same.
Anyway, today’s post is all about cleaning and organizing your baking area to kick off the new year fresh. For those of us faltering in our resolutions, this might just be the push we need to get back on track for the magical year of 2025!
Am I the only one who finds cleaning strangely therapeutic? If you’re nodding along, this post is definitely for you. There’s something incredibly satisfying about scrubbing cookie tins, baking trays, and reorganizing sugar and flour containers. So, here’s my ultimate guide to organizing your baking space, complete with pictures and videos of my aesthetically pleasing attempts.
Ultimate Cleaning and Organizing Guide for Your Baking Space
Step 1: Designate Your Baking Zone
If you haven’t done this already, secure a spot in your kitchen dedicated solely to baking ingredients, tools, equipment, and any other materials you use.
Step 2: Contain and Label
Buy containers for your ingredients and label them. I grabbed some from Amazon, but after ten, it started to break the bank. If you’re also trying to avoid breaking the bank on aesthetic containers, recycle old jars you likely have lying around—jam jars, coffee jars, tea tins, you name it. I understand the desire to make these jars look pretty by removing the sticky labels, and I’ve got you covered.
Here’s how to do it: Soak the jars in hot, soapy water with vinegar for 30 minutes. While they’re soaking, mix equal parts olive oil and baking soda. After soaking, spread this mixture over the labels and gently scrub them off. Rinse in clean water, and voilà—pristine jars ready for use.
Step 3: Fill Your Containers
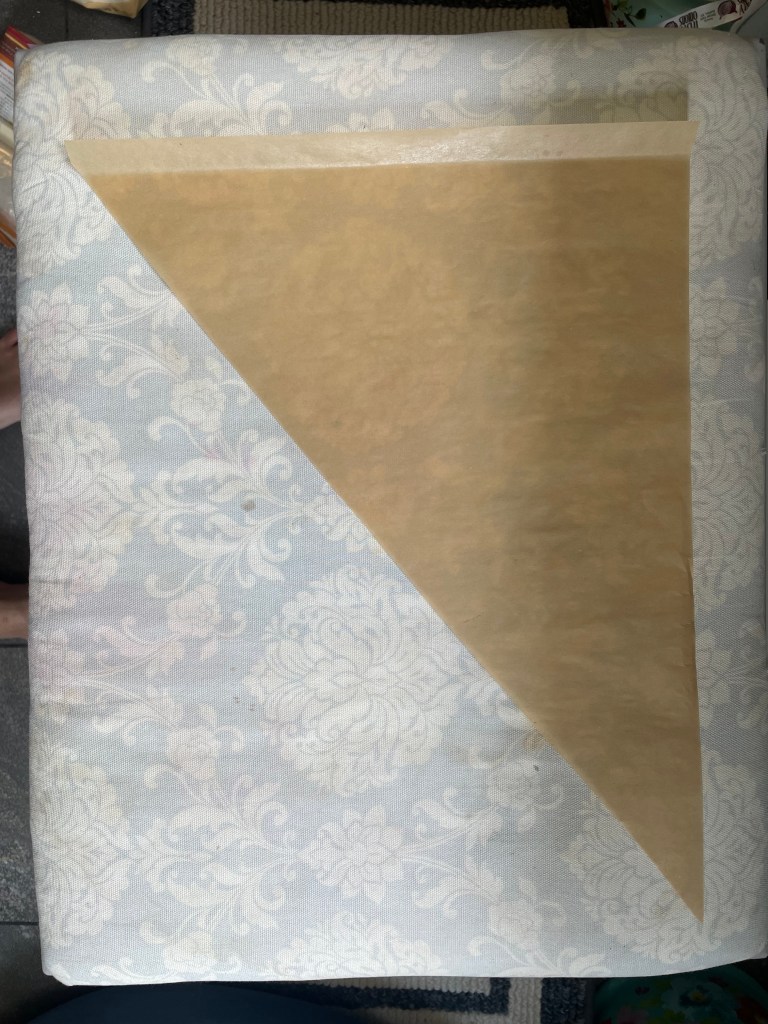
Once everything’s labeled, start filling your containers. A pro tip: use a funnel to avoid making a mess. No funnel? No problem. You can easily make one with parchment paper and adjust the size as needed. If your ingredients don’t completely fit into the containers, store the leftovers in ziploc bags wrapped with rubber bands for freshness. And, of course, label everything with the item name and expiration date. Trust me, mistaking one type of flour for another is all too easy!
Step 4: Reorganize Everything Else
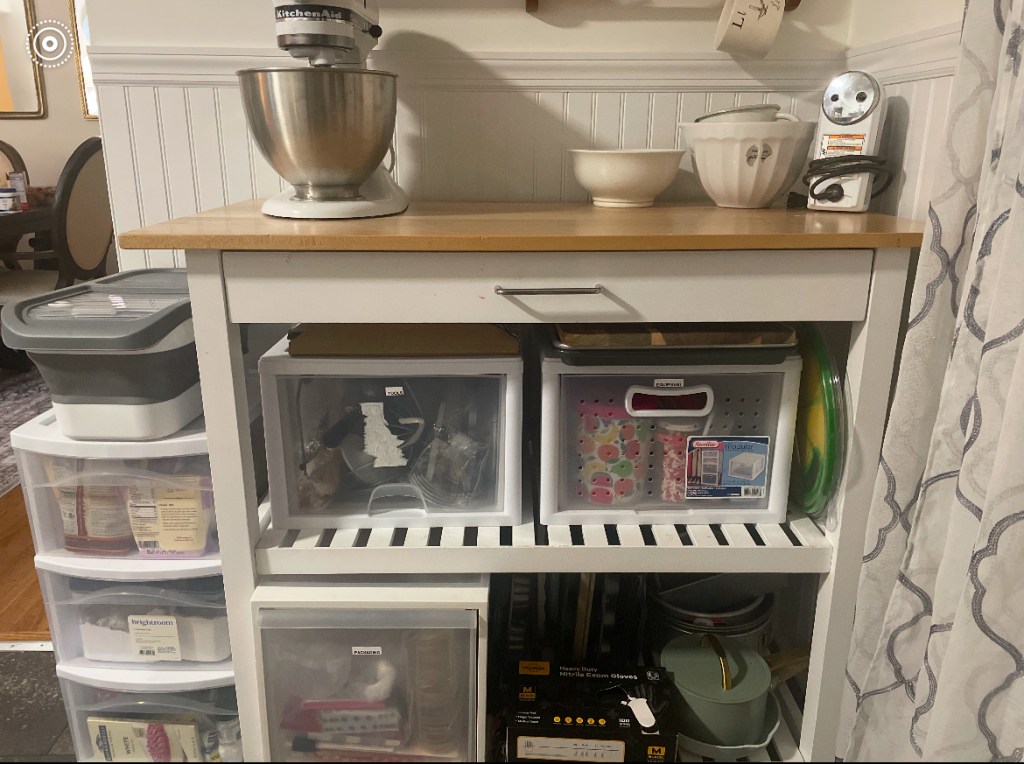
Next, gather all your baking supplies and make room for them. I use my kitchen island, which has storage drawers, as shown in the pictures below. I categorized my items into four groups: ingredients, equipment/tools, packaging, and decorations like sprinkles and cupcake wrappers. This setup makes it easy to grab what I need from start to finish.
I also have a built-in drawer for frequently used items like measuring spoons, whisks, and piping nozzles. Larger items like baking trays and pans are stored at the bottom of the island.
Step 5: Final Touches
Put everything back in its place, finish cleaning up, and bask in the satisfaction of your beautifully organized baking space!
This guide can be customized for anyone to match your needs, and the space you have available in your kitchen.
I hope you enjoyed this post and picked up some new, helpful tips. Wishing everyone a safe, healthy, and happy new year! I also hope you enjoy the pictures below, and my dog keeping me company as I get through this very messy process.